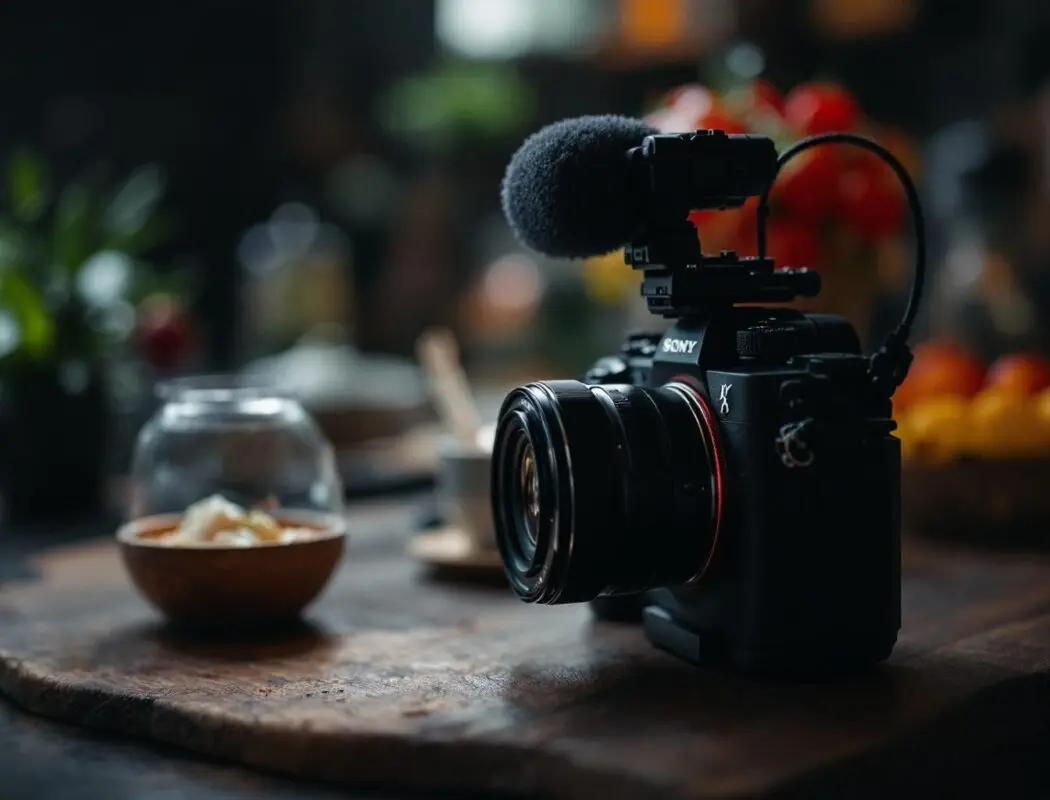
The Sony A7C II is one of the most capable compact full-frame cameras for video, but pulling a cinematic look from it requires more than pressing the record button in auto mode. The camera’s S-Log3 gamma, flexible color science, 4K recording, and excellent autofocus give you professional-grade tools — the challenge is knowing how to configure and use them together.
This guide walks through every setting and technique you need to produce cinematic video on the A7C II, from initial camera setup through to color grading in post. Whether you are shooting short films, branded content, or documentary-style projects, these principles will get you to a polished, film-like result.
What Makes Video Look “Cinematic” on the Sony A7C II?
Before touching any settings, it helps to understand what “cinematic” actually means in technical terms. The cinematic look is defined by a few core characteristics:
- Shallow depth of field: Subject sharp, background blurred — this is what full-frame sensors excel at
- 24 frames per second: The motion cadence of cinema, producing natural motion blur that our brains associate with film
- Controlled exposure: The 180-degree shutter rule combined with ND filters for proper exposure at wide apertures
- Flat color profile: Shooting in log or flat profiles to preserve dynamic range for color grading
- Deliberate color grading: Applying a color grade that establishes mood, tone, and visual consistency
- Clean audio: Cinematic video requires professional audio — on-camera mics rarely cut it
The A7C II’s full-frame sensor, S-Log3 support, and compact form factor make it an excellent platform for cinematic work. Let us configure it.
How Do You Set Up the Sony A7C II for Cinematic Video?
Step 1: Set Your Frame Rate to 24fps
Navigate to Shooting > Image Quality > Movie > Record Frame Rate and set it to 24p. This is the foundation of the cinematic look. The 24 frames per second cadence produces motion blur on moving subjects that our visual system interprets as “filmic.” Shooting at 30fps or 60fps results in smoother motion that looks more like television or news footage.
For your recording format, select XAVC S-I 4K for the best quality (intra-frame compression) or XAVC S 4K for smaller files with inter-frame compression. Both are excellent — the XAVC S-I codec is better for heavy color grading, but XAVC S is sufficient for most projects and easier on your storage.
Step 2: Set Your Shutter Speed (The 180-Degree Rule)
Switch to Manual Exposure mode (M) for video. Set your shutter speed to 1/50 (the closest value to double your frame rate when shooting 24fps). This is the 180-degree shutter angle rule, originating from film camera rotary shutters, and it produces the amount of motion blur that defines the cinematic look.
A shutter speed of 1/50 at 24fps means each frame captures approximately 1/50th of a second of motion. Faster shutter speeds (1/100, 1/200) produce a staccato, hyper-real look — think the battle scenes in Saving Private Ryan. Slower shutter speeds produce excessive blur. For standard cinematic work, 1/50 is your default.
Important: If you are shooting in a region with 50 Hz lighting (most of Europe, Asia, Australia), 1/50 also avoids flicker from artificial lights. In 60 Hz regions (North America), you may occasionally see flicker at 1/50 under certain fluorescent or LED lights. If flicker appears, switching to 1/60 is an acceptable compromise.
Step 3: Configure Your Picture Profile for S-Log3
Navigate to Exposure/Color > Color/Tone > Picture Profile. Select PP10, which is pre-configured for S-Log3 / S-Gamut3.Cine. This combination provides approximately 15 stops of dynamic range and a wide color gamut that gives you maximum flexibility in color grading.
Key settings within PP10 (verify these are set correctly):
- Gamma: S-Log3
- Color Mode: S-Gamut3.Cine
- Black Level: 0
- Knee: Off (or Manual with Point at 109%)
- Detail: -7 (minimize in-camera sharpening for a more organic look)
S-Log3 footage looks flat and washed-out straight from the camera — this is intentional. The flat profile preserves highlight and shadow detail that you recover during color grading. If you are not comfortable grading footage, an alternative is to use Cine1 or Cine2 picture profiles (PP4 or PP5), which offer a more filmic look with less dynamic range but require minimal grading.
Step 4: Set Your ISO
When shooting in S-Log3, the base ISO is 800. This is the sensitivity where the sensor delivers maximum dynamic range with the lowest noise in log mode. You can go lower (ISO 640 or 400) if you are in bright conditions, but you sacrifice some shadow detail. Going higher increases noise in the shadows.
For indoor shooting in controlled lighting, ISO 800 is your starting point. Outdoors in daylight, ISO 800 at f/2.8 and 1/50 shutter will be massively overexposed — which is where ND filters become essential.
Why Do You Need ND Filters for Cinematic Video?
Here is the problem: shooting at 24fps with a 1/50 shutter speed on a bright day at ISO 800 means your aperture would need to be f/16 or smaller to achieve correct exposure. At f/16, you have no background blur — your footage looks flat and documentary-like.
Neutral density (ND) filters solve this by reducing the light entering the lens, allowing you to maintain wide apertures (f/2.8, f/4) while keeping your shutter speed at 1/50 and ISO at 800. Think of them as sunglasses for your lens.
What ND Filters Do You Need?
For the A7C II, I recommend a variable ND filter (ND2-ND32 or ND2-ND400) for convenience, or a set of fixed ND filters for maximum optical quality:
- ND8 (3 stops): Overcast outdoors, open shade
- ND64 (6 stops): Bright daylight, golden hour
- ND1000 (10 stops): Harsh midday sun (rarely needed for video)
Variable ND filters are more practical for run-and-gun shooting because you can continuously adjust density without swapping filters. The downside is that cheap variable NDs introduce color casts and the dreaded “X” pattern at higher densities. Invest in a quality variable ND from NiSi, PolarPro, or Tiffen — budget $80-150 for a filter that will not degrade your image.
Match the filter diameter to your lens. If you are using the Sony FE 24-50mm f/2.8 G, that is a 67mm filter thread. The Sony 24-70mm GM II uses 82mm. Buying the larger size with a step-down ring lets you use one filter across multiple lenses.
What Are the Best Lenses for Cinematic Video on the A7C II?
Lens choice has a massive impact on the cinematic quality of your footage. Here are the top options organized by use case:
Best All-Around Cinematic Zoom
Sony FE 24-70mm f/2.8 GM II — The benchmark for cinematic zoom work on Sony. Razor-sharp, minimal focus breathing (further reduced by the A7C II’s breathing compensation), de-clickable aperture ring, and beautiful bokeh. It is larger and heavier than the 24-50mm G, but the extra reach to 70mm is valuable for tighter compositions and interview framing.
Best Compact Cinematic Zoom
Sony FE 24-50mm f/2.8 G — If you value portability and the A7C II’s compact philosophy, this lens matches the body perfectly. Silent AF, de-clickable aperture, and minimal breathing make it excellent for video. The 24-50mm range covers most cinematic scenarios when you are the camera operator controlling your distance to the subject.
Best Cinematic Prime
Sony FE 35mm f/1.4 GM — The 35mm focal length is arguably the most cinematic for narrative work. At f/1.4, the depth of field on full-frame is razor-thin, creating that immersive, shallow-focus look. The GM’s rendering is smooth and organic — it has a character that zooms cannot replicate.
Best Budget Cinematic Lens
Sony FE 50mm f/1.8 — At around $250, this lens produces beautiful cinematic footage at f/1.8 to f/2.8. It is not the fastest to focus and it is a bit noisy during video AF, but for manual focus cinematic work (which many filmmakers prefer), it delivers outstanding image quality for the price.
How Do You Set Up Autofocus for Cinematic Video?
The A7C II’s autofocus system is one of the best available for video, and configuring it correctly makes a significant difference:
- Focus Mode: Set to Continuous AF (AF-C) for most scenarios. This keeps the camera continuously tracking your subject.
- Focus Area: Use Tracking: Spot or Tracking: Zone to direct the camera toward your intended subject. For solo vlogging or talking head, Face/Eye AF works flawlessly.
- AF Transition Speed: Set to 1 (Slow) or 2 for cinematic focus transitions. The default setting (4-5) produces fast, snappy focus changes that look great for stills but feel jarring in cinematic video. A slow transition speed creates the smooth, purposeful rack focus that defines professional filmmaking.
- AF Subject Shift Sensitivity: Set to 1 (Locked On) or 2. This prevents the camera from racking focus to background elements that momentarily appear in the focus area. You want the camera to stay locked on your subject even when other objects cross the frame.
For more deliberate cinematic work — short films, narrative content, or controlled shoots — consider manual focus. Manual focus racks are a hallmark of cinematic technique, and the A7C II’s focus peaking and MF assist magnification make manual focusing precise even on a compact body.
How Do You Set Up Audio for Cinematic Video?
The A7C II’s built-in microphones are adequate for reference audio, but cinematic video demands external audio. Here is a practical audio setup:
For Solo Shooting / Vlogging
A wireless lavalier system like the DJI Mic 2 or Rode Wireless Go II clips to your clothing and feeds clean audio into the camera’s 3.5mm mic input. Set the camera’s audio recording level to manual and adjust until your normal speaking voice peaks around -12 dB to -6 dB on the audio meters.
For Interviews and Dialogue
Use a dedicated shotgun microphone like the Rode VideoMic NTG mounted on the camera or held on a boom pole just outside the frame. For two-person interviews, a dual-transmitter wireless system with each person wearing a lavalier provides the cleanest results with independent level control.
Audio Settings on the A7C II
- Audio Recording: On
- Audio Rec Level: Manual (adjust to peak at -12 to -6 dB)
- Audio Out Timing: Live (for real-time monitoring through headphones)
- Wind Noise Reduction: Off (when using external mic — this setting applies processing to the internal mic only)
Always monitor audio with headphones. The A7C II has a 3.5mm headphone output — use it. Discovering a buzzing cable or clipping audio in post is a costly mistake that headphone monitoring prevents entirely.
How Do You Color Grade S-Log3 Footage from the A7C II?
Color grading is where your flat, desaturated S-Log3 footage transforms into a cinematic image. Here is a practical workflow:
Step 1: Apply a Base LUT or Color Space Transform
In your editing software (DaVinci Resolve, Premiere Pro, or Final Cut Pro), apply a color space transform to convert S-Log3/S-Gamut3.Cine to Rec.709 (standard display color space). In DaVinci Resolve, this is done through the Color Space Transform OFX plugin or through ACES workflow.
Alternatively, apply a technical LUT — Sony provides free S-Log3 to Rec.709 LUTs on their website, and many colorists start with these as a base. Apply the LUT first, then make adjustments on top of it.
Step 2: Correct Exposure and White Balance
With the base transform applied, adjust exposure (lift, gamma, gain) to match your intended look. S-Log3 is designed to be exposed 1-2 stops above what your light meter suggests — if you exposed correctly in camera, the footage should look properly exposed after the transform.
Set your white balance by selecting a neutral reference point in the image (something that should be gray or white) and adjusting until it appears neutral. The A7C II’s auto white balance works well, but manual white balance in post gives you more control.
Step 3: Creative Color Grade
This is where you establish the mood. Common cinematic color grades include:
- Teal and orange: Cool shadows, warm highlights — the most popular cinematic grade. Achieved by pushing shadows toward blue/teal and midtones/highlights toward orange/amber.
- Desaturated and cool: Reduced saturation with a slight blue-gray cast — creates a serious, dramatic tone.
- Warm vintage: Lifted blacks (reducing contrast), warm overall tone, slight film grain — evokes a nostalgic, film-like quality.
In DaVinci Resolve (the free version handles everything described here), use the color wheels (lift/gamma/gain) for broad tonal adjustments and the curves panel for targeted hue-vs-hue or hue-vs-saturation shifts. The qualifier tool lets you select specific colors (like skin tones) and protect them from your overall grade.
Step 4: Add Film Grain and Final Polish
Real film has grain, and adding a subtle grain overlay to your digital footage helps sell the cinematic illusion. DaVinci Resolve includes a built-in Film Grain plugin (under OpenFX). Set it to a subtle level — 35mm fine grain at 10-20% opacity is a good starting point. If the grain is obvious, you have gone too far.
Final steps include adding a subtle vignette (darken the corners slightly to direct the viewer’s eye toward the center) and ensuring skin tones look natural and healthy regardless of your creative grade.
What Are the Best Camera Settings for Different Cinematic Scenarios?
| Scenario | Frame Rate | Shutter Speed | Aperture | ISO | Profile | ND Filter |
|---|---|---|---|---|---|---|
| Indoor dialogue scene | 24fps | 1/50 | f/1.4 – f/2.8 | 800-3200 | S-Log3 | None |
| Outdoor golden hour | 24fps | 1/50 | f/2.8 | 800 | S-Log3 | ND8-ND64 |
| Bright daylight | 24fps | 1/50 | f/2.8 – f/4 | 800 | S-Log3 | ND64-ND128 |
| Slow motion B-roll | 120fps | 1/250 | f/2.8 – f/5.6 | 800-1600 | S-Log3 | Varies |
| Low-light moody scene | 24fps | 1/50 | f/1.4 | 3200-6400 | S-Log3 | None |
For slow-motion B-roll at 120fps, the shutter speed doubles to 1/250 (following the 180-degree rule for 120fps). Note that the A7C II records 4K at up to 60fps and crops slightly for 120fps in 1080p. Plan your framing accordingly — the crop at 120fps means a 24mm lens effectively becomes closer to 35mm.
What Stabilization Options Work Best for Cinematic Video?
The A7C II includes 5-axis in-body image stabilization (IBIS) rated for up to 7 stops with compatible lenses. For cinematic video, you have several stabilization approaches:
- IBIS only: Suitable for static shots and slow, deliberate camera movements. Set Active SteadyShot to Standard — the Active mode crops the image and can introduce a slight “wobble” effect during walking.
- Gimbal: For smooth tracking shots, walking footage, and dynamic movement, a 3-axis gimbal is the cinematic standard. The A7C II’s light weight (514 g body only) means it works well with compact gimbals like the DJI RS 3 Mini or Zhiyun Weebill 3.
- Tripod / fluid head: For interview setups, controlled scenes, and any shot where the camera should be rock-solid. A fluid video head allows smooth pans and tilts that look professional.
- Handheld with intention: Some cinematic styles (documentary, war film aesthetic) embrace handheld movement. The A7C II’s IBIS takes the edge off handheld shake while preserving the organic, human feel of the movement.
Frequently Asked Questions
Can the Sony A7C II shoot 4K 60fps for cinematic slow motion?
Yes. The A7C II records 4K at up to 60fps in XAVC S format. For slow-motion playback on a 24fps timeline, 60fps footage plays back at 40% speed — noticeably slow but not extreme slow motion. For more dramatic slow motion, use the 120fps mode at 1080p resolution, which gives you 20% speed on a 24fps timeline. Both modes produce clean, detailed footage suitable for cinematic B-roll and emotional impact shots.
Is S-Log3 always better than other picture profiles for cinematic video?
Not always. S-Log3 provides maximum dynamic range and color grading flexibility, but it requires proper exposure technique (overexposing by 1-2 stops) and committed post-production grading. If you are delivering quick-turnaround content or do not enjoy the grading process, the HLG (Hybrid Log Gamma) profiles or Cine1/Cine2 picture profiles produce attractive, cinematic-leaning results with far less post-production work. S-Log3 is best when you have time to grade and want maximum creative control.
What storage cards do I need for 4K cinematic video on the A7C II?
The A7C II uses SD cards (UHS-I/UHS-II). For 4K recording, a UHS-II card with a minimum write speed of 100 MB/s is recommended. Cards like the Sony TOUGH SF-M series, ProGrade Digital V60, or SanDisk Extreme Pro UHS-II provide reliable performance. For XAVC S-I 4K recording (intra-frame), aim for V90-rated cards to avoid recording interruptions. Budget approximately 128 GB per 2 hours of 4K 24fps footage in XAVC S format.
How do I avoid the “video look” and make A7C II footage look more like film?
Beyond the technical settings covered in this guide, several subtle choices contribute to a film-like quality: reduce in-camera sharpening (Detail setting to -7 in your picture profile), add film grain in post, shoot at 24fps exclusively, avoid perfect stabilization (a tiny amount of organic movement looks more filmic than gimbal-smooth footage), use practical lighting rather than flat on-camera LED panels, and grade your footage with lifted blacks (never crushing to pure black) and slightly muted highlights. The combination of these elements creates a feel that viewers associate with cinema rather than video.
What is the difference between Active SteadyShot and standard IBIS for video?
Standard IBIS uses the sensor-shift mechanism to compensate for camera shake. Active SteadyShot adds a digital crop (approximately 10%) and uses electronic stabilization in combination with the optical IBIS for more aggressive shake correction. Active mode is better for handheld walking shots but introduces a slight crop and can occasionally produce a “jello” effect during sudden movements. For cinematic work on a tripod or gimbal, use Standard mode. For handheld work where smoothness is critical, Active mode is the better choice despite the crop.