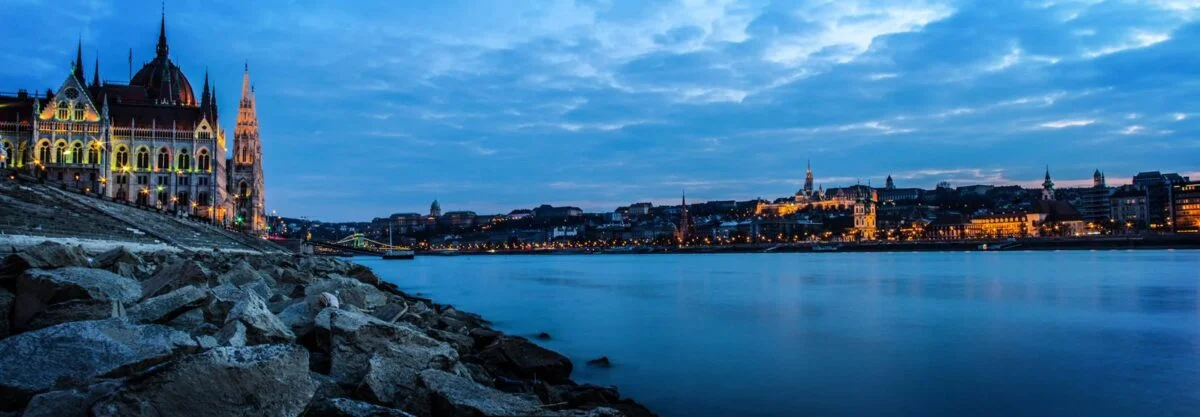
Is it really possible to transform a flat, uninspiring sky into a dramatic backdrop that breathes life into your landscape photos? You've likely found yourself staring at a scene that speaks to you, only to capture an image where the sky simply doesn't do justice to the moment.
As a seasoned photographer, you know that the sky is half the landscape, and when it lacks vibrancy, the entire image can feel lackluster. But before you dismiss the potential of an overcast day, consider the array of techniques at your disposal. From the subtle art of using graduated filters to the more complex procedure of sky replacement, there are methods to infuse energy into the most stubbornly dull skies.
Yet, each technique comes with its own set of considerations—missteps can lead to an unnatural look that undermines the authenticity of your shot. Stick with me, and you'll uncover how to apply these enhancements with a deft hand, ensuring your landscapes convey the emotion and drama you initially envisioned.
Understanding Sky Replacement
Sky replacement is a technique where you swap out the original sky in your photo with a more dynamic or visually appealing one, effectively transforming the mood and impact of the image. You've captured a stunning landscape, but the sky? It's lackluster. Don't let that flat, gray expanse dampen your artwork.
With sky replacement, you're in complete control. You choose the perfect sky that reflects your vision and amplifies the drama in your composition. Think of the sky as a canvas. You're the artist with the power to repaint it. Whether you're after the fiery reds of a sunset or the moody blues of a stormy sky, you dictate the atmosphere.
It's not just about aesthetics, either. A well-chosen sky can guide your viewer's eye, add depth, and balance the elements within your frame. But remember, with great power comes great responsibility. You must ensure the lighting and perspective of your chosen sky match the rest of your scene. Otherwise, you risk an unnatural, disjointed effect.
Embrace this control, refine your technique, and you'll elevate your landscapes from mundane to magnificent.
Mastering Graduated Filters
Graduated filters can dramatically enhance the skies in your landscape photos, creating a seamless transition from the horizon to the heavens. When you’re out in the field, these filters help balance exposure between the brighter sky and darker foreground, but for more refined results, mastering sky transitions in post-processing is essential.
- Choose the Right Filter Density
- *Soft-edge Graduated Filters*: Ideal for scenes with an uneven horizon, like mountain landscapes.
- *Hard-edge Graduated Filters*: Perfect for a flat horizon, such as ocean views.
- *Reverse Graduated Filters*: Tailor-made for sunrises and sunsets, darker at the horizon.
Remember, it's about balance. You don't want to overpower your scene, but rather enhance the natural gradients of the sky. By tweaking the position and density of your filter, you'll find that sweet spot where the sky's drama is heightened without appearing artificial.
Lastly, practice makes perfect. Use your filters in various conditions to see how they interact with different lighting scenarios. You'll soon develop a keen eye for just the right amount of gradation to make your skies pop.
Leveraging HDR Techniques
To bring out the full dynamic range in your landscapes, you'll want to master High Dynamic Range (HDR) photography, a technique that merges multiple exposures to capture detail in both the brightest and darkest parts of your image. This is your ticket to transforming a lackluster sky into a dramatic backdrop that commands attention.
Here's what you need to do: set your camera on a tripod and take at least three shots of the same scene at different exposures. One should be underexposed to retain details in the highlights, one correctly exposed for the midtones, and one overexposed to reveal details in the shadows. It's crucial you don't change the framing or focus between shots.
Next, use HDR software to blend these images into one. You'll have the power to adjust the final image to your liking, making sure the sky isn't just an afterthought but a compelling element of your composition. Dial in the contrast, tweak the saturation, and finesse the luminance of your clouds to make them pop.
Applying Selective Color Adjustments
Once you've mastered HDR techniques, you can further refine your landscape images by applying selective color adjustments to emphasize the sky's hues and tones. This approach gives you the power to transform a lifeless sky into a captivating element of your composition. Here's how you can take control and make those skies pop:
- Selective Color Adjustments:
- Hue/Saturation Layers:
- *Target Specific Colors:* Use the Hue/Saturation adjustment layer to target and enhance blues or grays.
- *Refine with Masks:* Paint on the layer mask to apply changes only to the sky, leaving other elements unaffected.
- Color Balance Layers:
- *Adjust Color Tones:* Fine-tune the midtones, shadows, and highlights for a balanced or dramatic sky.
- *Blend Modes:* Experiment with blend modes like 'Soft Light' to subtly introduce warmth or coolness.
- Gradient Maps:
- *Create Smooth Transitions:* Apply a gradient map adjustment layer to introduce a natural color gradient.
- *Customize Colors:* Select colors for the gradient that complement the overall mood of your image.
Introducing Artificial Lighting Effects
Adding artificial lighting effects can elevate your landscape photography, creating a dynamic sky even when nature doesn't cooperate. You're in control, and with the right techniques, you can transform a lackluster sky into a masterpiece.
Start by identifying the light sources in your scene. Imagine where the sun or moon would be if it were more dramatic. With editing software, you can add a radiant glow or mimic the golden hour's warm tones, even if the original scene was taken midday.
Use gradient filters or layering techniques to introduce these effects subtly. You'll want to match the direction and quality of the existing light to avoid a jarring or unrealistic appearance.
Enhance the lighting further by introducing rays of light, which can be done with specialized brushes or by carefully using the radial blur effect in a photo editor. Remember, it's about enhancing what's already there, not creating a fantasy—unless that's your intent.
Conclusion
You're equipped with the techniques to transform uninspiring skies into stunning backdrops. From sky replacement to the mastery of graduated filters, from harnessing the power of HDR to color adjustments, and the introduction of artificial lights, you have what it takes to enhance your landscapes.
However, it's important to consider that some purists believe in capturing the scene as it is, arguing that the true art of photography lies in finding beauty in the natural state of the sky, no matter how mundane it might appear.
With this in mind, go ahead and infuse those lackluster skies with new energy, but also feel free to share your thoughts. Do you prefer to keep the skies authentic, or are you in favor of these enhancements?
Comment below and let's discuss the impact of these choices on the essence of landscape photography.