Sure, you could continue snapping landscape photos that resemble Monet's impressionist paintings, but perhaps you're yearning for that crystal-clear sharpness that distinguishes professional work.
You've trekked to the perfect location, you're standing before a breathtaking vista, and now it's time to ensure the scene is captured with the utmost precision.
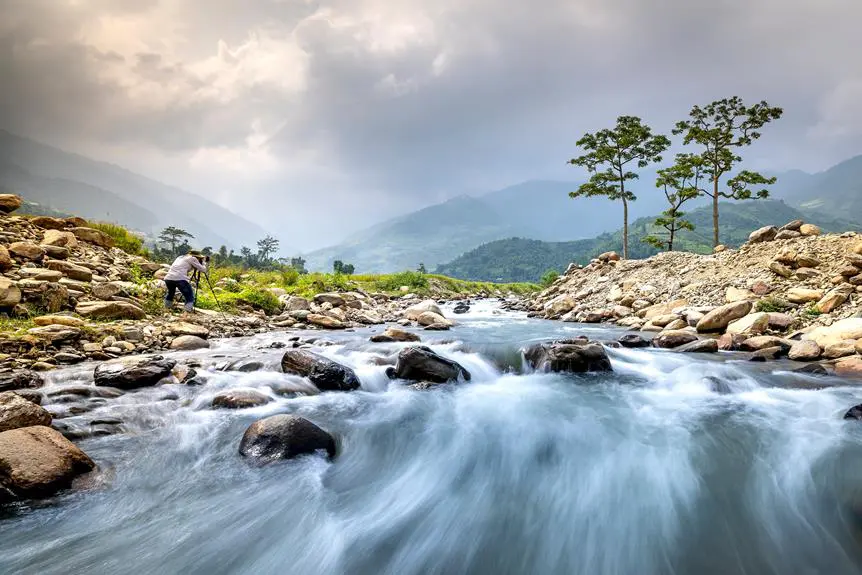
First and foremost, anchor your camera to a sturdy tripod; it's the bedrock of sharp photography, eliminating the tremors and shakes that no amount of caffeine can justify.
With your aperture settings mastered, you'll have the power to harness depth of field like a maestro, ensuring every layer of your landscape is defined to perfection.
But don't stop at technical prowess; the art of hyperfocal distance awaits to elevate your focus strategy, and post-processing sharpening techniques can transform a good shot into a masterpiece.
The secrets to elevating your landscape photos to the pinnacle of sharpness are within your grasp, and the next steps will introduce you to a world where blur is nothing but a distant memory.
Utilize a Sturdy Tripod
To ensure tack-sharp landscape images, anchor your camera with a sturdy tripod to eliminate any unwanted movement. Remember, in the pursuit of excellence, stability is non-negotiable. A solid tripod acts as the foundation of your photography setup; it's the bedrock that allows you to meticulously compose your shot and hold the camera steady during long exposures or when waiting for the perfect light.
You'll want to invest in a tripod that confidently bears the weight of your camera and lens without wobbling. Carbon fiber options offer the best of both worlds—lightweight for hiking into the wild yet steadfast in windy conditions. Make sure the legs lock securely and the head allows for smooth, precise adjustments.
Once you've set up, use a remote shutter release or your camera's timer to minimize vibrations when you're taking the shot. If your camera has it, activate the mirror lock-up function to reduce internal camera shake. You're after a crystal-clear rendition of nature's splendor, and these steps are pivotal in achieving that.
Mastering your equipment means you're in command. With a steady tripod and sharp focus, you're set to capture the landscape's grandeur with the clarity it deserves.
Master Your Aperture Settings
Having established a stable base with your tripod, it's crucial to master aperture settings to achieve the desired depth of field in your landscape photographs. Your aperture, or f-stop, is key to controlling sharpness across the scene. Aim to use a smaller aperture (larger f-stop number) to maximize depth of field, ensuring both foreground and background elements appear crisp.
Typically, an aperture of f/8 to f/16 strikes a balance between depth of field and lens sharpness. Be mindful, though, that going too far beyond f/16 can introduce diffraction, which softens the image. Experiment within this range to find your lens's sweet spot—it's the aperture where your images are sharpest.
Remember that smaller apertures reduce the amount of light hitting the sensor, so adjust your ISO or shutter speed accordingly. Don't shy away from bumping up the ISO a bit if it means securing a faster shutter speed to counteract any potential movement, including wind rustling through trees.
Ultimately, mastering your aperture isn't just about technical precision; it's about expressing your creative vision. By controlling depth of field, you dictate the viewer's focus and the story your photo tells. So take charge, refine those settings, and watch as the sharpness in your landscapes reaches new heights.
Focus With Precision
Once you've dialed in your aperture, it's time to sharpen your focus skills to ensure every detail of your landscape is captured with precision. This demands your full control over where and how your camera locks onto the scene. Don't rely on automatic focusing; it's not foolproof, especially in complex landscapes. Instead, switch to manual focus. It's your ticket to impeccable sharpness.
Use your camera's live view mode and zoom in on the area you want to be the sharpest. This could be a tree in the foreground or a distant mountain peak. Adjust the focus ring slowly until the details are crisp. Remember, in landscapes, you typically want a deep field of focus. Aim to focus about one-third into the scene, which often yields the best overall sharpness due to the properties of depth of field.
Consider using focus stacking if you're after front-to-back sharpness. This technique involves taking multiple photos with different focus points and blending them in post-processing. It's a bit more work, but the control over sharpness you'll gain is unparalleled.
Don't let a soft focus ruin your shot. Take charge, fine-tune with intention, and capture the landscape as it deserves to be seen – in all its stunning clarity.
Embrace Mirror Lock-up
After mastering manual focus for sharp landscapes, another technique to consider is mirror lock-up, which further reduces camera shake and ensures tack-sharp images. When you press the shutter button, the mirror inside a DSLR camera flips up out of the way before the image is taken. This movement can introduce vibration. Locking up the mirror before taking the shot minimizes this risk.
Here's how to take control with mirror lock-up:
- Enable mirror lock-up in your camera settings.
- Consult your camera's manual for specific instructions.
- Typically found in the custom settings menu.
- Use a remote shutter release or your camera's self-timer.
- This avoids touching the camera and adding shake.
Explore Hyperfocal Distance
To achieve maximum sharpness throughout your landscape photos, you'll want to understand and utilize hyperfocal distance. This technique ensures that everything from a certain point in your foreground to the farthest background is in focus.
Here's how you do it: first, you select the aperture that provides the best sharpness for your lens—often two to three stops down from the widest opening.
Next, you need to calculate the hyperfocal distance for your specific focal length and aperture. There are apps and charts that can help you with this, or you can use a hyperfocal distance calculator. Once you've got your number, focus your lens at that distance.
This is where you take control, setting the scene so that your compositions come out crisp from front to back.
Sharpen in Post-Processing
While capturing your image with sharpness in mind is crucial, employing post-processing techniques can further enhance the clarity of your landscape photos. Remember, you've got the power to transform a good photo into a great one with just a few tweaks. Here's how you can assert control over the final sharpness of your images:
- Selective Sharpening
- *Use masks or layers* to apply sharpening only to specific parts of your image, like edges or areas with fine detail.
- *Avoid over-sharpening* soft areas such as the sky, which can introduce unwanted noise.
- Sharpening Tools
- *Unsharp Mask (USM)*: Adjust the amount, radius, and threshold to fine-tune the sharpness without affecting the overall photo too much.
- *High Pass Filter*: Overlay this filter on a duplicated layer and adjust the opacity for subtle yet effective sharpening.
Be meticulous when sharpening in post-processing. Overdoing it can lead to artifacts and excessive noise, which will detract from the natural beauty of your landscape. Instead, aim for a balanced approach that accentuates the textures and contours of your scene with precision.
With these techniques in your arsenal, you'll maintain the reins on image quality, guiding your landscapes to their sharpest potential.
Control ISO Sensitivity
Managing your camera's ISO sensitivity is key to minimizing noise and maintaining the sharpness of your landscape photographs. You're after that pristine clarity, where every detail pops without the grainy interference that high ISO levels can introduce. Keep in mind, as the ISO number goes up, so does the sensitivity of your camera's sensor, but at the cost of increased noise.
Start with the lowest ISO setting your camera allows, typically ISO 100 or 200. This baseline will give you the cleanest image possible. When you're shooting in broad daylight, there's plenty of light to work with, so staying at this low ISO should be a breeze. But as the light fades, you might be tempted to crank up the ISO. Resist that urge.
Instead, use a tripod. This allows you to shoot at slower shutter speeds without worrying about camera shake, meaning you can maintain a low ISO even in dim conditions. If you must increase the ISO, do so gradually, checking the results for noise as you go. Your goal is to find the sweet spot where you achieve a sharp, well-exposed image without sacrificing image quality.
With practice, you'll master the balance between ISO, aperture, and shutter speed to maintain ultimate control over your landscape shots.
Conclusion
You're now well-equipped with advanced techniques to boost the sharpness in your landscape photography. Secure your camera on a sturdy tripod, dial in the optimal aperture, and achieve precise focus. Implement mirror lock-up, get to grips with hyperfocal distance, and embrace post-processing for that extra bit of sharpening. Keep your ISO as low as possible to preserve the finest image quality. With these tactics, you're on your way to capturing landscapes with remarkable sharpness that truly pop.
However, it's worth noting a contrarian perspective: some photographers argue that excessive sharpness can detract from the mood or message of an image, suggesting that sometimes a softer focus can convey a sense of atmosphere or emotion more effectively. What're your thoughts on this? Have you ever found that less-than-tack-sharp images have enhanced your work? Do you prioritize emotion over technical perfection? Share your experiences and views in the comments below.
Let's discuss the balance between sharpness and storytelling in landscape photography. Grab your gear, and let's explore the clarity of your vision together!