As you venture into the vast vistas of landscape photography, mastering the medium means more than just capturing the grandeur; it's about preserving the pristine details that give nature its nuance.
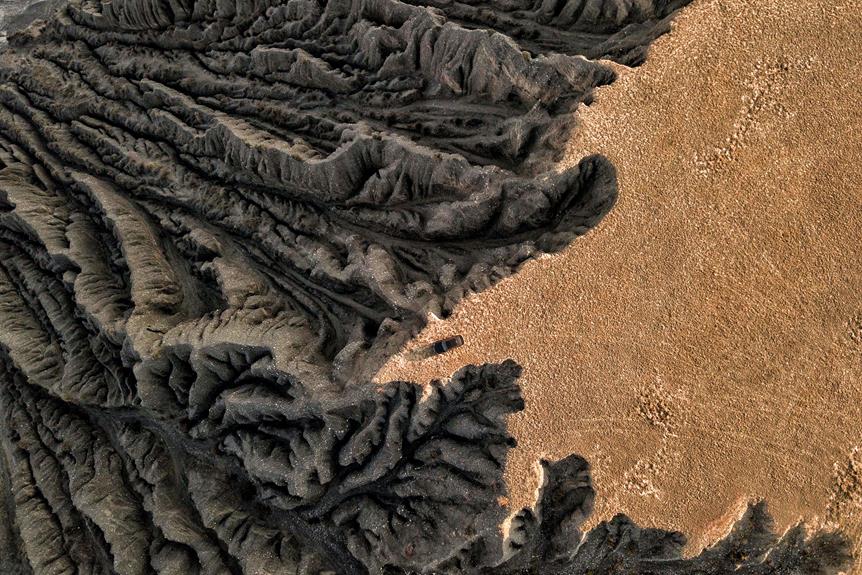
You've likely encountered the frustration of photos emerging with muddy textures, where the intricate patterns of nature blend into an indistinct smear of colors and shapes. It's essential to understand that such pitfalls aren't just about post-processing prowess; they stem from a series of choices you make long before you click the shutter.
From the subtle play of light across the horizon to the precise settings that dictate depth and detail, every decision impacts the clarity of your compositions. As you explore the following five tips, you'll learn how to sidestep the common traps that lead to muddled images and discover how to imbue your landscape photography with the crispness and clarity it deserves.
Will you be able to transform your techniques to produce images that truly resonate with the sharpness of reality? Let's examine the critical steps that stand between you and the perfect shot.
Understand Your Camera's Limits
Recognizing your camera's limitations is crucial in preventing the muddy textures that can mar your landscape photos. You've got to understand that no matter how advanced your equipment might be, it's not without its boundaries. Your camera's sensor size, dynamic range, and lens quality all play pivotal roles in how well you can capture the nuances of a scene.
You're aiming for clarity and detail, so you must know when and where your camera excels. If you're dealing with a high-contrast scene, for instance, pushing your camera's dynamic range to its limits will often result in those washed-out skies or underexposed foregrounds that lead to a loss of detail. This is where your technical knowledge comes into play—use bracketing techniques or filters to manage the light and preserve the scene's integrity.
Moreover, don't push your ISO too high; noise can quickly erode the crispness you're after. Instead, stabilize your camera on a tripod and opt for a longer exposure. You're in control here, remember that. Make informed decisions based on your camera's specs, and you'll steer clear of those muddy textures that threaten to undermine your vision.
Master the Light Conditions
Harnessing the nuances of natural light is essential to capturing landscape photos that burst with vibrancy and avoid the pitfall of muddy textures. You've got to understand that light isn't just a component of your landscape; it's the lifeblood. Your mission is to master its ever-changing conditions to ensure your shots are clear and crisp.
Start by scouting your location at different times of the day. Observe when the light complements the scene, creating depth and highlighting textures without washing them out. You'll find that the golden hours—shortly after sunrise and before sunset—offer a warm, diffused light that can add a magical touch to your landscapes.
But don't shy away from other conditions. Overcast skies can provide a soft, even light that minimizes harsh shadows and contrasts, which is perfect for revealing subtle details without muddiness. And if you're faced with midday sun, consider using a polarizing filter to cut the glare and enhance the colors.
Optimize In-Camera Settings
Once you've mastered the light, it's crucial to fine-tune your camera settings to prevent your landscape photos from becoming lackluster with muddy textures. Achieving clarity and detail is all about taking control of your camera and making intentional choices. Here's what you need to focus on:
- Shoot in RAW: This gives you the highest level of quality and the most data to work with in post-processing, ensuring you can pull out the details without adding noise.
- Adjust your ISO: Keep it as low as possible. A high ISO can introduce noise, which muddies the textures. Stick to ISO 100 or 200 for the cleanest shot.
- Fine-tune your aperture: Use a narrower aperture (higher f-stop number) for greater depth of field, which keeps more of your landscape in sharp focus.
- Set the correct white balance: Don't rely on auto white balance. Choose the setting that matches your lighting conditions or customize it to ensure colors are true to life and clear.
Embrace Post-Processing Techniques
Dive into post-processing to enhance the textures and details of your landscape images. The power to refine your photos doesn't end when you press the shutter; it's just getting started with image sharpness and clarity adjustments. Start by adjusting the contrast sliders to bring out the textures.
Start by adjusting the contrast sliders to bring out the textures. Be precise – too much contrast may lead to artificial-looking scenes, while too little can leave your image flat. Utilize clarity and sharpness tools to define edges and make details pop, but don't go overboard; your goal is to reflect reality, not distort it.
Harness the power of selective adjustments. Use graduated filters, radial filters, or brush tools to target specific areas that need texture enhancement. This localized approach prevents global changes that could affect the overall balance of your image. You're sculpting your scene, accentuating the peaks of a mountain range or the ripples of a stream with meticulous attention to detail.
Lastly, don't forget to zoom in and inspect your work. Pixel-level perfection might be unattainable, but close examination ensures you're not introducing unwanted noise or halos around your textures. With these post-processing techniques, you'll master the art of presenting crisp, clear landscapes that burst with life.
Choose the Right Gear
Selecting the appropriate camera and lenses is crucial for capturing landscapes with clear, detailed textures. You want gear that offers you the precision and flexibility to bring out the finest details in your compositions.
Here's a checklist of what to look for:
- High-Resolution Sensor: Choose a camera with a high megapixel count to ensure that you capture the intricate details of your landscape. More pixels translate to sharper images and give you more leeway in post-processing.
- Quality Lenses: Invest in lenses with superior optics. Wide-angle lenses are typically favored for landscapes, but a sharp telephoto can also provide stunning detail in compressed scenes.
- Sturdy Tripod: A robust tripod is non-negotiable. It'll keep your camera steady during long exposures, helping to prevent any blurring that can muddy your textures.
- Polarizing Filter: Use a polarizing filter to enhance the sky and foliage, and to cut through glare, which can significantly improve the clarity of your textures.
You've got the power to create crisp, compelling landscapes. The right gear is just the toolset you need to translate your vision into images that resonate with breathtaking clarity. Don't settle for less—equip yourself with the best and take control of your photographic journey.
Conclusion
You've got the tools to keep your landscapes crisp. Remember your camera's limits and work within those boundaries to create magic.
Utilize the light to your advantage, and fine-tune those in-camera settings for the sharpest images.
While post-processing can be a fantastic tool to refine your captures, some purists argue that the true art lies in capturing the scene as naturally as possible, without relying on digital enhancements. What's your take on this? Don't be afraid to join the conversation and share your thoughts in the comments.
Regardless of the approach you choose, gear up wisely—it's your partner in achieving the perfect balance of clarity and authenticity in your photos.
Now, step out with confidence and capture the world's beauty in its most vivid form!