I’ve spent countless hours perfecting my landscape shots, and I’m eager to share the game-changing HDR techniques I’ve mastered. But first, it’s important to know before post-processing to ensure you’re capturing the best possible exposures for your HDR workflow.
Whether you’re battling harsh shadows or blown-out skies, I’ll guide you through 14 essential HDR post-processing tips.
You’ll gain the control you crave, transforming your images from flat to fantastic.
Get ready to sharpen, align, and merge like a pro.
Let’s dive in and turn those good shots into breathtaking masterpieces.
Understanding HDR Photography
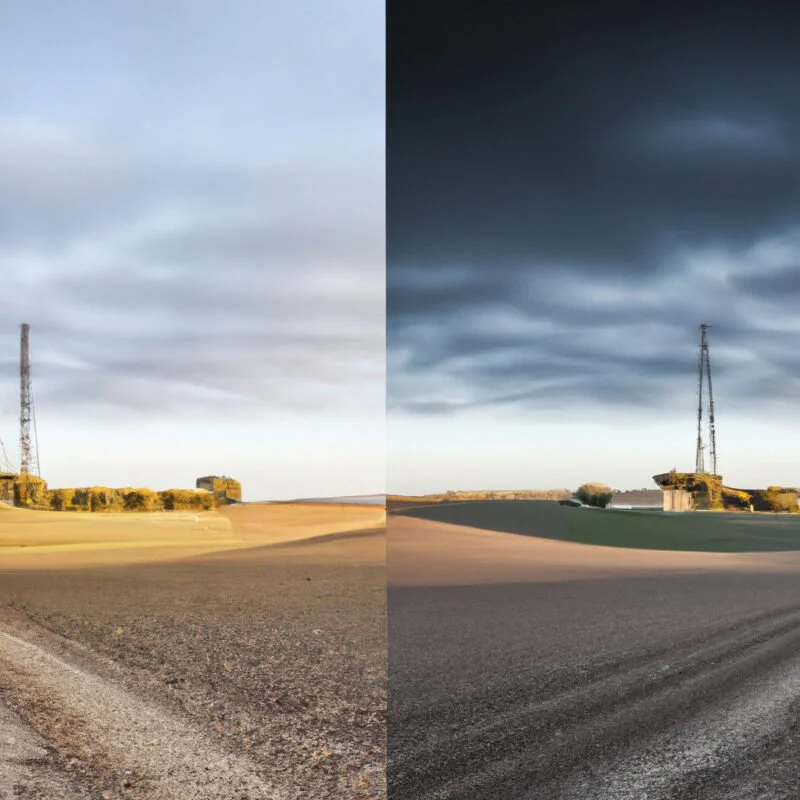
I’ll begin by defining HDR photography as a technique that combines multiple exposures to create a single image with an extended dynamic range. This means I can capture more detail in both the brightest highlights and the darkest shadows than I could with a single shot.
To master HDR, I’ve learned to take control of my camera’s settings, ensuring I bracket my exposures with precision. I typically shoot a series of images at different exposure values, and I’m careful to maintain a steady camera position to simplify the blending process.
Then, in post-processing, I meticulously merge these exposures, balancing the tones for a natural yet striking result. Understanding HDR’s potential empowers me to harness the full spectrum of light in my landscapes.
Shooting for HDR Processing
When I’m out in the field, ready to shoot for HDR, I focus on how to capture dynamic range effectively, ensuring I get the full spectrum of light and shadow in my bracketed shots.
Use a Tripod: Keeping the camera stable is non-negotiable to match the frames perfectly.
Bracket Exposures: I typically shoot a minimum of three exposures: one standard, one underexposed, and one overexposed.
Check Histograms: After each shot, I review the histograms to make sure I’ve captured the full dynamic range without clipping the highlights or shadows.
Each step is methodically planned to give me the highest quality materials for post-processing, where I’ll have the power to create the envisioned HDR masterpiece.
Choosing the Right Software
Moving on to the next crucial step, I’ve found that selecting the appropriate HDR software can significantly impact the final quality of my landscape images. The right tool not only streamlines my workflow but also gives me the control to fine-tune my vision. It’s imperative to choose software that aligns with my meticulous nature and elevates my artwork.
Here’s a comparison table that highlights key differences between two popular HDR software options:
| Feature | Software A | Software B |
|---|---|---|
| User Interface | Intuitive | Complex |
| Control Level | High | Moderate |
| Presets | Customizable | Limited |
| Speed | Fast | Slower |
| Output Quality | Superior Details | Good Resolution |
This table stirs a sense of empowerment, ensuring that I make an informed decision that resonates with my desire for precision and excellence.
Aligning Your Exposures
Once I’ve selected my HDR software, ensuring that my exposures are perfectly aligned is my next critical task. This step is crucial because any misalignment can cause ghosting or blurring, which ruins the crispness of a landscape photo. Here’s how I maintain control and precision during alignment:
Use a Tripod: I always shoot with a stable tripod to minimize movement between exposures.
Enable Software Alignment: I turn on the alignment feature in my HDR software to correct any slight shifts.
Check Overlays: I manually review the overlay of the exposures to confirm they’re flawlessly aligned.
Merging Exposures Effectively
After meticulously aligning my exposures, the next step is merging them to harness the full dynamic range of the scene. I ensure each frame is perfectly synced to avoid ghosting. Using software like Lightroom or Photomatix, I select my bracketed shots and initiate the merging process. I prefer manual control over automatic algorithms, so I often tweak the settings, adjusting the tone mapping to achieve a realistic yet striking result.
I’m careful to preserve natural lighting and avoid the temptation to over-process. The goal is to maintain detail in both shadows and highlights without introducing noise or halos. Once I’m satisfied with the blend, I’ll move on to refining contrasts and colors.
Learn more in our Essential Post-Processing Skills for Food Photographers resource.
The result? A balanced, vibrant composition that truly reflects the landscape’s beauty.
Setting Tone Mapping Parameters
Having merged my exposures, I now focus on fine-tuning the tone mapping parameters to further enhance the landscape’s dynamic range. This critical step ensures that I maintain control over the final image, bringing out the best in both the shadows and highlights.
Here’s how I tackle this:
Strength/Intensity: I adjust the overall strength of the tone mapping to achieve a realistic look without overdoing the HDR effect.
Detail Contrast: I fine-tune this setting to ensure that details in the landscape are crisp, giving the image depth and dimension.
Tone Compression: I carefully balance this parameter to preserve the natural contrast while avoiding any loss of detail in the highlights and shadows.
Balancing Highlights and Shadows
With all tone mapping parameters set, I next turn my attention to meticulously balancing every highlight and shadow for a harmonious landscape image. It’s crucial; a landscape should feel both dynamic and natural. I carefully adjust the sliders, ensuring that highlights don’t blow out and shadows retain detail without becoming muddy. I’m constantly checking the histogram for a balanced spread, indicative of a well-exposed shot.
I’ll often toggle between local and global adjustments to fine-tune specific areas. This precision control lets me dodge and burn where necessary, accentuating depth and leading lines without overprocessing. It’s a delicate dance between light and dark, and I make sure to step through it methodically, always aiming for an end result that’s as true to the scene as it’s visually compelling.
Enhancing Color Vibrancy
In terms of color vibrancy, I adjust the saturation and vibrance sliders to inject life into my landscape images without oversaturating. It’s a delicate balance to enhance the hues while maintaining a natural look. I’m careful to not let the colors become too gaudy, which can detract from the overall realism and beauty of the scene.
To ensure I have precise control over the colors:
- I work with individual color channels to fine-tune specific tones.
- I use targeted adjustments to enhance areas that need a pop, while leaving other sections more subdued.
- I often apply a subtle S-curve to the saturation layer to add depth selectively.
Each adjustment is done with a critical eye, aiming for that perfect harmony between a vibrant landscape and authenticity.
Correcting Chromatic Aberrations
Moving on from enhancing color vibrancy, I’ll tackle chromatic aberrations, those unwanted color fringes that can mar an otherwise pristine landscape image. To ensure I’m in control of every pixel, I meticulously scan my images for these imperfections. Chromatic aberration often appears along high-contrast edges, and it can be a tell-tale sign of HDR processing if left uncorrected.
Here’s a straightforward table that outlines the steps I follow for correction:
| Step | Action |
|---|---|
| 1 | Identify areas with chromatic aberration |
| 2 | Use lens correction tools in editing software |
| 3 | Manually adjust sliders for precise control |
| 4 | Preview and refine until the aberrations are eliminated |
This methodical approach allows me to confidently present images that reflect my true intention, devoid of distracting color artifacts.
Utilizing Localized Adjustments
I’ll now focus on the power of localized adjustments to fine-tune specific areas of my HDR landscapes. Localized adjustments are critical for gaining precise control over my images, allowing me to selectively enhance, correct, or draw attention to certain features without affecting the entire photo.
Here’s how I typically use them:
Dodging and Burning: I selectively brighten or darken areas to lead the viewer’s eye or emphasize elements.
Graduated Filters: Ideal for balancing exposure between the sky and land, I apply a soft transition effect that gently blends into the scene.
Adjustment Brushes: For meticulous edits, I use brushes to adjust saturation, clarity, or sharpness on specific objects or textures.
These tools are indispensable for crafting a well-balanced landscape that resonates with depth and detail.
Sharpening for Detail Clarity
After adjusting specific areas, it’s crucial to sharpen the image to bring out the fine details and textures that make landscapes come to life. I typically zoom in on crucial elements like trees, rocks, and water to ensure I’m enhancing the right details without overdoing it. I’ll use selective sharpening tools to avoid introducing noise into the sky or other smooth areas.
I prefer to apply sharpening at the end of my workflow to gauge its impact accurately. I’m careful not to oversharpen, as it can create halos around edges or make the photo look unnatural. Instead, I aim for a subtle yet crisp result that respects the natural aesthetics of the scene.
Noise Reduction Techniques
I reduce noise in my HDR landscape images to ensure a clean, refined final product. It’s a critical step in post-processing that can’t be overlooked. Here’s how I maintain control over noise without sacrificing detail:
Shoot at Low ISO: I always start in the field, opting for the lowest ISO possible to minimize noise from the outset.
Dedicated Noise Reduction Software: For more challenging cases, I use specialized software like Topaz DeNoise or Neat Image, which offers advanced algorithms and precise adjustments.
Selective Noise Reduction: In Lightroom or Photoshop, I selectively apply noise reduction to avoid a plastic look, ensuring textures in the landscape remain crisp.
Creative Use of Gradients
Moving on to enhance the visual impact, I often incorporate gradients in my HDR landscapes to subtly guide the viewer’s eye through the scene. By strategically applying gradient filters during post-processing, I can control light and color balance, making certain elements pop while gently toning down others.
This isn’t just about aesthetics; it’s about directing attention where I want it. For instance, I’ll add a darkening gradient from the top to emulate a natural vignette, focusing the gaze on the center. Conversely, I’ll brighten the foreground to draw the eye into the depth of the photo.
It’s a powerful tool, giving me the ability to create atmospheric perspective and depth, which are essential for captivating landscape photography. Each gradient is a deliberate stroke in my visual storytelling.
Finalizing With Image Output
Before exporting the final HDR image, I ensure all elements align with my envisioned outcome, from resolution to color accuracy. It’s critical to have absolute control over the final product, which means taking care of several key factors:
Resolution and Size: I select the optimal resolution for the intended use, whether it’s for web display or large-scale printing.
Color Profiles: I meticulously choose the right color profile, ensuring the colors I’ve painstakingly adjusted appear consistently across various devices.
File Format: Depending on usage, I decide between JPEG, TIFF, or another format, weighing factors like file size and quality.
These preparations guarantee my HDR landscape is presented exactly as I intend, with no surprises in quality or presentation.