Hey there, I’m an avid photographer and weather enthusiast! I’ve tackled the challenge of capturing nature’s moods, and I’m here to share my top 14 tips for photographing diverse weather scenarios.
Whether you’re after the perfect golden hour shot or the drama of a storm, I’ve got the tricks to help you master the elements. Let’s dive in and take control of any lighting situation Mother Nature throws our way!
Understanding Natural Light Dynamics
Natural light’s variability plays a crucial role in how I capture the essence of any weather scenario through my lens. I’ve learned to harness this dynamic element, adjusting my techniques to seize the mood and drama each condition offers.
Bright, sunny days require a keen eye for shadows and highlights, ensuring I don’t lose detail. Overcast skies provide soft, diffuse light, perfect for capturing subtle textures without harsh contrasts.
I’m always alert to the golden hours—just after sunrise and before sunset—when light is at its most magical. It’s then that I make crucial decisions on exposure and composition to master the scene.
Utilizing the Golden Hour
While I adapt my approach to capture the changing light throughout the day, I’ve found that utilizing the golden hour gives my photographs a warm, ethereal quality that can’t be replicated at any other time. For those eager to harness this magical lighting, it’s essential to plan meticulously.
The golden hour occurs just after sunrise or before sunset, when the sun’s position produces a soft, diffused light that’s perfect for highlighting textures and creating long, dramatic shadows.
I make sure to arrive on location early, set up my equipment, and frame my shots before this fleeting light begins. I’m constantly aware of the time and ready to adjust my settings quickly to capture the changing light. It’s this level of control and preparedness that turns a good shot into a great one during the golden hour.
Overcast Skies for Soft Shadows
Under the diffused canopy of overcast skies, I’ve discovered that the even light is ideal for capturing images with soft, subtle shadows. This flat lighting minimizes harsh contrasts and allows me to control the mood of my shots more effectively. I find that overcast conditions are particularly great for portraits, as they prevent the squinting and unflattering shadows that bright sun can cause.
Here’s a quick reference table I use:
| Benefit | Strategy |
|---|---|
| Even Exposure | Lower contrast settings |
| Soft Portraits | Use reflectors |
| Enhanced Colors | Adjust white balance |
| Mood Management | Play with exposure |
This approach ensures that I utilize the soft light to its fullest potential, giving me the control I need to create compelling images.
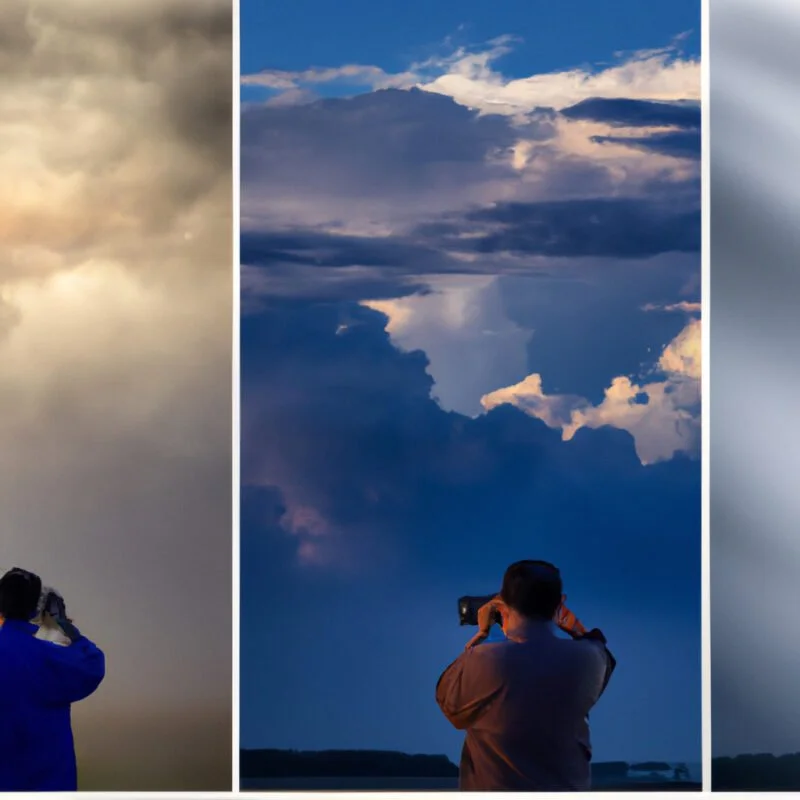
Capturing Dramatic Storm Clouds
Transitioning from the subtlety of overcast skies, I find that photographing storm clouds offers a dynamic contrast with their menacing shapes and tones. To ensure you’re capturing the full drama of an impending storm, here are some bulletproof tips:
- Safety First: Always prioritize your safety. Keep a safe distance from severe weather.
- Use a Tripod: Stability is key for sharp images, especially in low-light conditions.
- Settings Matter: Opt for a lower ISO to reduce noise, a fast shutter speed to capture movement, and a small aperture to ensure a deep depth of field.
- Timing is Everything: Be patient. Wait for the moment when the light and cloud formation align to create that breathtaking scene.
Mist and Fog Photography Techniques
Although capturing storm clouds can be thrilling, I find that photographing mist and fog requires a delicate approach to encapsulate their ethereal quality. The key is to find a balance in exposure to ensure the mist or fog enhances the scene without overwhelming it. I always aim to shoot during the golden hours when the soft light adds a magical glow to the fog. I also pay attention to composition, using the mist to add depth and mystery to my images.
Here’s a quick reference table I’ve put together for you:
| Technique | Description |
|---|---|
| Exposure | Overexpose slightly to retain details in the fog. |
| Focus | Manually focus if autofocus struggles with the low contrast. |
| White Balance | Custom white balance to avoid overly cool tones. |
| Composition | Use fog as a layering tool to create depth. |
Maximizing Contrast in Snowy Scenes
Switching from the subtleties of mist and fog, another challenge I face is capturing the stark beauty of snowy landscapes, where maximizing contrast is vital to avoid a washout of white.
To ensure the snowy scenes I photograph have depth and dimension, I adhere to several key techniques:
- Utilize spot metering to accurately expose for the snow, ensuring it appears crisp and textured, not a pure white blur.
- Incorporate colorful elements to break up the monochromatic expanse and add visual interest.
- Play with shadows during the golden hours to create contrast and emphasize contours in the snow.
- Adjust the exposure compensation to avoid overexposing the snow, which can lead to loss of detail.
These strategies give me control over the final image, capturing snow’s purity and the scene’s mood.
Photographing Rain and Reflections
While I’ve captured the silent serenity of snow, photographing rain requires a shift in focus to dynamic reflections and the rhythm of falling droplets. To maintain control in these conditions, I adjust my shutter speed to freeze the rain or create a sense of motion, depending on the effect I’m after.
I’m always on the lookout for puddles and wet surfaces that offer mirror-like reflections, adding depth to the scene. I’ll often use a polarizing filter to manage reflections and enhance saturation, carefully composing my shots to capture the interplay between light and water.
In rain photography, it’s crucial to protect my gear from the elements, using weather-sealed equipment or protective covers. By mastering these techniques, I can confidently turn any rainy day into a photographic opportunity.
Harnessing Wind Elements in Landscapes
Capturing the energy of wind in landscape photography, I often seek out scenes where its invisible force is made visible through swaying trees, rippling grass, or storm-sculpted clouds. To convey the wind’s essence and maintain control over my compositions, here’s a strategic approach:
- Stable Tripod: Use a heavy-duty tripod to prevent camera shake and ensure sharp images, especially in gusty conditions.
- Shutter Speed Mastery: Experiment with shutter speeds to either freeze motion for clarity or allow for creative blur that suggests movement.
- Directional Awareness: Position myself to capture wind effects head-on or side-on, maximizing the visual impact of bending elements.
- Focused Foreground: Include a static element in the foreground for contrast against the dynamic wind-blown background, grounding the viewer’s experience.
Chasing Lightning for Impactful Shots
After mastering the dance of wind in my compositions, I’m now turning my lens to the electric spectacle of lightning, aiming to seize those split-second flashes that illuminate the skies. For those of you seeking to capture lightning’s raw power with precision, I’ve honed a methodical approach. I set up my gear with unwavering focus, ensuring I’m ready to react the moment nature unveils its electric art.
To grab your attention and offer structured guidance, here’s a concise table:
| Setting | Recommendation |
|---|---|
| Mode | Manual |
| Aperture | f/8 to f/11 |
| ISO | 100 to 200 |
| Shutter | Long Exposure |
| Focus | Infinity |
These settings give you a controlled environment to capture lightning’s unpredictable beauty, turning chance into a crafted skill.
Balancing Exposure in Mixed Weather
I often find that mixed weather conditions present a unique challenge when trying to maintain the right exposure, as the interplay of sun and clouds can rapidly alter the lighting. Here’s how I tackle these fluctuating conditions to keep my shots perfectly exposed:
- Shoot in RAW: This gives me the latitude to adjust exposure during post-processing without losing quality.
- Use spot metering: I meter for the highlights to ensure they aren’t blown out, then I adjust shadows in post.
- Bracket my shots: I take multiple exposures to merge them later for a balanced image.
- Carry ND filters: They’re indispensable for managing contrast and preventing overexposure in bright spots.
Working With Harsh Midday Sunlight
Harnessing the abundant light during harsh midday sun can yield striking photographs if you manage the intense shadows and highlights effectively. I’ve found that using the sun as a backlight can soften the harshness and create a beautiful halo effect around subjects. When I’m out in the field, I always remember to adjust my camera settings to compensate for the strong light. Here’s a quick reference table I use:
| Setting | Purpose | Midday Sun Adjustment |
|---|---|---|
| Aperture | Control depth of field | Smaller aperture (high f-number) |
| Shutter Speed | Exposure time | Faster (1/1000 sec or more) |
| ISO | Sensor sensitivity | Lower ISO (100-200) |
| Exposure Comp. | Adjust brightness | Often underexpose (-1 EV) |
| Polarizing Filter | Reduce glare, enhance skies | Rotate for best effect |
Embracing the Blue Hour
Shifting from the midday sun’s brilliance, the blue hour offers a serene atmosphere that I capture by adjusting my camera settings for the ethereal light. This twilight period before sunrise or after sunset is prime for creating mood in my photos. The cooler tones and subdued light demand my attention to detail and precise settings.
To gain control and make the most of the blue hour, here’s what I do:
- Use a tripod to stabilize my camera for longer exposures.
- Manually set the white balance to accentuate the blue tones.
- Opt for a wider aperture to let in more light.
- Increase the ISO slightly but keep an eye on noise levels.
These steps ensure I harness the blue hour’s full potential, crafting images that resonate with tranquility and depth.
Freezing Movement in Windy Conditions
Transitioning from the tranquil blue hour, I now brace myself to capture the dynamic energy of windy conditions, freezing motion with high shutter speeds and careful composition. I’m always ready to tweak my settings to ensure that each element is sharp, conveying the raw power of a gust or the delicate dance of leaves in a breeze.
To give you a clearer picture, here’s a quick-reference table that I always keep in mind:
| Setting | Purpose | Tip |
|---|---|---|
| Shutter Speed | Freezes movement | 1/500s for leaves, >1/1000s for rain |
| Aperture | Controls depth of field | f/4 for background blur |
| ISO | Adjusts for proper exposure | Keep as low as possible |
Enhancing Colors Post-Rainfall
After a downpour, I’m eager to capture the vivid hues that rain leaves in its wake, knowing that the saturation of colors can be dramatically enhanced with the right approach. The dampness acts like a natural saturator, making colors pop.
Here’s how I take control and make the most of this effect:
- Adjust contrast and clarity: In post-processing, I dial up the contrast for depth and clarity to make details stand out.
- Play with vibrance: I increase vibrance more than saturation to avoid artificial looks while emphasizing the natural richness.
- Use selective color adjustments: I often tweak individual color channels to bring forward the most compelling elements.
- Apply a polarizing filter: When shooting, a polarizing filter can reduce glare and enhance the sky, complementing the wet surfaces’ effect.