In the realm of photography, timelapse has emerged as a captivating technique that encapsulates the passing of time in a single frame. To master this art, photographers must employ a range of techniques and strategies to enhance their timelapse creations.
This article unveils twelve innovative techniques that will elevate your timelapse photography to new heights. From selecting the ideal subject to utilizing motion control devices, you will discover the secrets to creating mesmerizing timelapse masterpieces that captivate and inspire.
Choosing the Right Location
The selection of an appropriate location is a crucial factor in capturing captivating timelapse photography. To appeal to an audience that desires innovation, it is essential to choose a location that offers unique and visually stimulating elements. Look for places with interesting architecture, vibrant cityscapes, or breathtaking natural landscapes.
Consider the movement of people, vehicles, or clouds that can add dynamism to your timelapse. A location with a combination of both man-made and natural elements can create a visually striking contrast. Additionally, think about the lighting conditions and the time of day when choosing a location. Golden hour, sunrise, and sunset can provide soft and warm lighting, enhancing the overall aesthetics of your timelapse.
Selecting the Ideal Subject
When selecting the ideal subject for your timelapse photography, it is important to consider its visual appeal and potential for capturing captivating movement. The subject you choose should have interesting elements that will make your timelapse stand out and engage your audience.
Here are three key factors to consider when selecting your subject:
- Motion: Look for subjects that naturally lend themselves to movement, such as clouds moving across the sky, waves crashing on the shore, or people bustling through a busy street. The movement adds dynamism and visual interest to your timelapse.
- Colors and Contrast: Choose subjects with vibrant colors and strong contrast to create striking visuals. This could include colorful sunsets, cityscapes at night with bright lights, or landscapes with a mix of different elements.
- Storytelling: Consider subjects that tell a story or evoke an emotion. This could be capturing the transformation of a flower opening, the construction of a building, or the movement of a crowd during a protest. The story behind the subject can add depth and meaning to your timelapse.
Planning the Timing and Duration
To optimize your timelapse photography, meticulous planning of the timing and duration is paramount. Timing is crucial because it determines the overall effect and impact of your timelapse sequence. When planning the timing, consider factors such as the movement of the subject, the changing light conditions, and any other elements that can add interest to your composition.
Additionally, the duration of your timelapse should be carefully considered to ensure that it captures the desired narrative or story. Longer durations can showcase gradual changes, while shorter durations can emphasize fast-paced action or transformations.
Experimenting with different timing and durations will help you find the perfect balance and create visually captivating timelapse sequences that will impress your audience.
Setting Up Your Gear Properly
Proper gear setup is essential for achieving high-quality timelapse photography results. To ensure that your gear is set up correctly, consider the following tips:
- Stable Tripod: Use a sturdy tripod to prevent any camera movement during the timelapse. This will ensure that each frame is sharp and aligned properly.
- Intervalometer: Invest in a reliable intervalometer to automate the process of capturing images at set intervals. This will allow you to focus on other aspects of your shoot without worrying about manually pressing the shutter button.
- Power Source: Make sure you have sufficient power for your camera throughout the entire timelapse. Consider using external battery packs or AC power adapters to avoid running out of battery mid-shoot.
Adjusting Camera Settings for Time-lapse
To optimize your time-lapse photography, it is crucial to adjust the camera settings appropriately. These settings play a significant role in determining the final outcome of your time-lapse sequence.
Firstly, set your camera to manual mode to have full control over exposure, aperture, and ISO. This allows consistent settings throughout the entire sequence, resulting in a smooth and seamless timelapse.
Secondly, choose a small aperture (higher f-stop) to ensure a deep depth of field, keeping all elements in focus. Adjust the ISO to maintain image quality while avoiding excessive noise.
Lastly, set a suitable shutter speed to capture the desired motion blur or freeze the action.
Using the Appropriate Interval
Selecting the optimal interval is crucial for capturing captivating time-lapse sequences in your photography. The interval determines the speed at which time appears to be moving in your timelapse. To ensure the best results, consider the following:
- Experiment with different intervals: Try using shorter intervals, such as 1-2 seconds, for fast-paced subjects or movements. For slower subjects or scenes with less action, longer intervals, such as 5-10 seconds, may be more appropriate.
- Consider the desired final video length: If you want a shorter timelapse video, you will need to use shorter intervals to capture more frames in a shorter period. Conversely, longer intervals can result in longer videos with fewer frames.
- Factor in the subject's motion: Different subjects may require different intervals. For example, a fast-moving subject may require shorter intervals to capture each movement, while a slower subject may require longer intervals to create a smoother effect.
Capturing Smooth and Stable Footage
To achieve smooth and stable footage in your timelapse photography, it is important to utilize effective stabilization techniques. These techniques are essential in ensuring that your final timelapse video is visually appealing and free from any unwanted camera movements or shakes.
One of the most common methods used for stabilization is the use of a tripod or a sturdy surface to mount your camera. This helps to eliminate any handheld camera movements and keeps the camera steady throughout the entire timelapse sequence.
Another technique is the use of a gimbal or a stabilizing device, which provides smooth and fluid movements, even when the camera is in motion.
Enhancing Lighting Techniques
One way to further elevate the visual impact of your timelapse photography is by implementing effective lighting techniques. Proper lighting can greatly enhance the mood, depth, and overall quality of your timelapse footage.
Here are three lighting techniques to help you create stunning timelapse sequences:
- Golden hour: Take advantage of the soft, warm light that occurs during the first hour after sunrise or the last hour before sunset. This natural lighting casts a beautiful golden glow on your subjects, adding a magical touch to your timelapse.
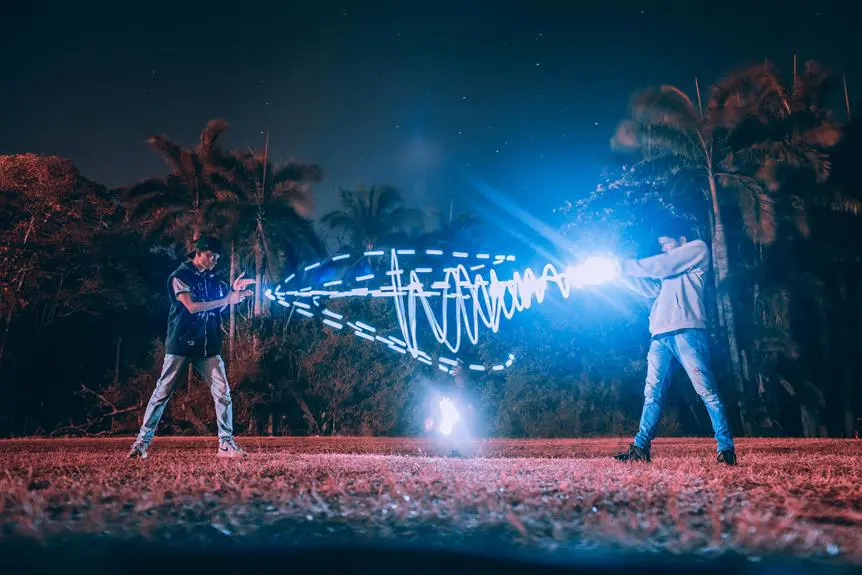
- Light painting: Experiment with light painting techniques to add a dynamic and artistic element to your timelapse. Use handheld lights or light sources to illuminate specific areas or objects during the long exposure times, creating captivating streaks and patterns.
- Color gels: Explore the use of color gels to add vibrancy and atmosphere to your timelapse. By placing colored filters in front of your light sources, you can create unique and dramatic effects that will make your footage visually striking.
Implementing these lighting techniques will give your timelapse photography a professional and innovative edge, resulting in captivating visuals that will leave your audience in awe.
Managing Exposure Changes
Managing exposure changes is crucial for creating high-quality timelapse photography.
Timelapse photography involves capturing a series of images over a period of time, allowing viewers to witness the passage of time in a condensed form. However, as the lighting conditions change during the timelapse, it can result in inconsistent exposures that can negatively impact the final output.
To manage exposure changes effectively, photographers can utilize techniques such as using manual exposure mode, adjusting the ISO settings, and utilizing neutral density filters.
Manual exposure mode allows photographers to have complete control over the exposure settings, ensuring consistent results. Adjusting the ISO settings can help in compensating for changes in lighting conditions.
Neutral density filters are useful for reducing the amount of light entering the camera, allowing for longer exposures and achieving smooth transitions between frames.
Utilizing Motion Control Devices
By incorporating motion control devices, photographers can add dynamic movement to their timelapse sequences, enhancing the visual appeal and creating a more immersive experience for viewers. These devices allow for precise control over camera movements, opening up a world of creative possibilities for timelapse photography.
Here are three ways photographers can utilize motion control devices to elevate their timelapse sequences:
- Pan and tilt movements: Motion control devices can smoothly pan and tilt the camera, adding a sense of depth and dimension to the timelapse. This technique works particularly well for capturing landscapes, cityscapes, and astrophotography.
- Slider movements: Sliders enable the camera to smoothly glide along a track, creating a cinematic effect in timelapse sequences. This technique is ideal for capturing dynamic scenes such as moving clouds, traffic, or people.
- Focus pulls: Some motion control devices can also control the focus of the camera, allowing for smooth and precise focus pulls in timelapse sequences. This technique adds an artistic touch and can be used to highlight specific elements in the scene.
Post-processing and Editing Tips
To optimize the visual quality of your timelapse sequences, employ these five post-processing and editing techniques.
First, utilize color grading to enhance the overall mood and tone of your footage. Experiment with different color palettes to create a unique and captivating look.
Second, apply sharpening techniques to bring out the fine details and make your images appear crisp and clear.
Third, use noise reduction tools to minimize any digital noise present in your footage, resulting in a cleaner and more professional appearance.
Fourth, consider adding dynamic effects such as motion blur or time remapping to add a sense of movement and drama to your timelapse sequences.
Finally, don't forget to export your final footage in the highest resolution possible for maximum impact.
Showcasing Your Timelapse Masterpiece
Continuing with the exploration of techniques to enhance your timelapse photography, it is essential to consider the most effective ways to showcase your timelapse masterpiece.
When it comes to showcasing your timelapse work, innovation is key. Here are three ways to present your timelapse masterpiece in a captivating and innovative manner:
- Create a cinematic experience: Edit your timelapse footage to create a visually stunning and immersive experience. Use techniques such as color grading, adding music or sound effects, and incorporating motion graphics to enhance the overall impact.
- Share on social media platforms: Utilize the power of social media to reach a larger audience. Upload your timelapse videos on platforms like Instagram, YouTube, or Vimeo, and engage with your followers. Consider using hashtags, collaborations, and interactive elements to make your timelapse stand out.
- Showcase in exhibitions or galleries: Consider displaying your timelapse work in art exhibitions or galleries. This allows you to present your timelapse masterpiece in a physical space, giving viewers a chance to appreciate the details and intricacies of your work.