What I Learned Shooting with the Sony FE 28-70mm Kit Lens
I almost left this lens at home. The Sony FE 28-70mm F3.5-5.6 OSS came bundled with my a7 III, and for a long time I treated it as a placeholder — something to mount while the “real” glass was en route. Then I spent two days photographing gardens, street facades, and waterfront scenes with nothing else in the bag. Eleven frames later, I had a different opinion entirely.
Here’s what that session taught me — shot by shot, number by number.
Lesson 1: Wide Open at 28mm Is Not an Apology
My median aperture across the whole session was f3.5, and my median focal length was 28mm. At first glance that sounds like I was just leaving the lens in its default state and hoping for the best. It wasn’t. It was a deliberate choice that I had to keep relearning.
Kit lenses have a reputation for being soft wide open, so photographers instinctively stop down to f8 or f11 “for sharpness.” But f8 at 28mm on a full-frame sensor gives you depth of field measured in meters. For close botanical subjects, that erases all subject-background separation. When I got down to the spiderwort below — three petals, narrow leaves, bright blue against a mess of green — I needed the background gone. f3.5 gave me enough separation to let the flower read as a distinct subject. f8 would have turned the background into competing detail.
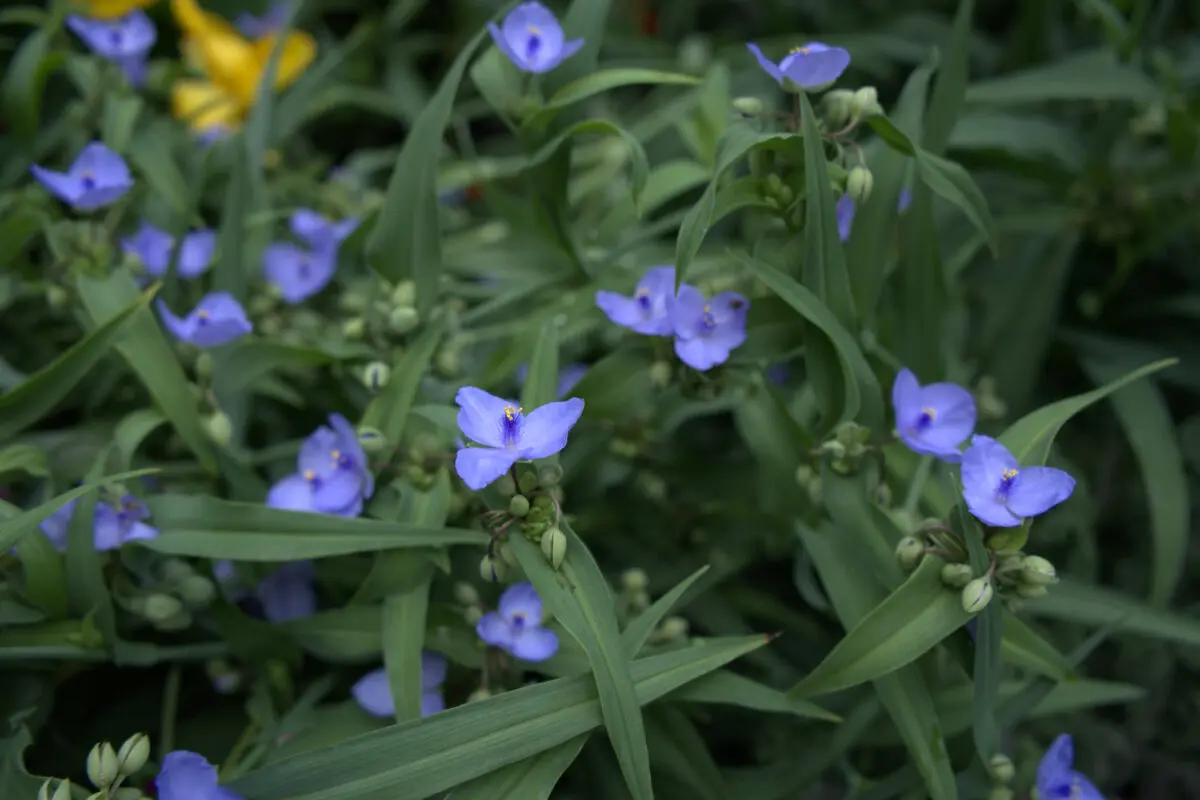
ISO 100 here told me the light was doing its job. In full shade or inside, I’d have to trade something. Outdoors in diffuse sun, I could have everything: base ISO, fast-enough shutter, maximum aperture. Take the freebie.
Lesson 2: 28mm Forces You Into the Scene
Most of my garden shots were at 28mm. That’s not laziness — at that focal length, to fill the frame with a subject the size of a flower cluster, you have to be physically close. That proximity changes your perspective in ways a telephoto cannot replicate. The background compresses less, the foreground looms larger, the scale relationship between subject and environment stays intact.


On these building façades, 28mm let me include enough wall to communicate the scale of the climbing vines while keeping the window boxes sharp. A 50mm would have required stepping back into traffic. A 70mm would have flattened the depth that makes the ivy feel three-dimensional against the stone.
Lesson 3: Reach for 70mm When You Need Compression, Not Coverage
When I did zoom to 70mm, I was usually after one of two things: reach without moving (staying out of a flower bed), or compression to stack a subject against a soft background at a distance I couldn’t physically close. Notice what happened to the aperture: at 70mm this lens is f5.6, one full stop darker than at 28mm. The tradeoff is real and worth knowing.


ISO jumped to 400 on that verbena shot because the flower was backlit against a brighter sky. The camera was doing its job — I set auto-ISO with a floor of 1/200s and let it find the exposure. Don’t fight it.
Lesson 4: Back at 28mm, Physical Proximity Is Your Bokeh Tool
With the wide end back in play, the only way to get subject separation is to close the gap between yourself and your subject. My globe amaranth and spiked celosia shots work because I was close enough that the flowers filled the near field while the garden receded. The blur isn’t dramatic — this isn’t an 85mm f1.4 — but it’s enough to read clearly in print and on screen.


Lesson 5: When the Light Drops, Commit to the ISO
The shot below happened indoors, late afternoon, ISO 5000. That’s a number that would have paralyzed me earlier in my shooting life. Now I look at it differently: the a7 III handles ISO 5000 without apology, and motion blur at 1/60s would have ruined the shot in a way that noise does not. The sharpness is there. The color holds. The fence detail reads. Noise is fixable in post; blur is not.

My ISO range that session ran from 100 to 5000. That’s the honest range of available-light shooting across two days. If your instinct is to cap ISO at 800 and underexpose instead, you’re trading recoverable noise for unrecoverable shadow detail. Let it ride.
Lesson 6: Wide Lenses Reward Simple Foregrounds
For anything environmental — scenes where the story is the relationship between near and far — 28mm earns its keep. The canal shot below works because the turquoise sculptures in the foreground anchor the grain silos in the background. At 70mm that connection would compress into a flat graphic. At 28mm, the spatial gap between them reads as depth.

The Lens I Stopped Ignoring
The FE 28-70mm isn’t a glamour lens. It won’t win gear-head arguments. But across eleven frames — shot wide open most of the time, at 28mm most of the time, at whatever ISO the light demanded — it gave me images I’m still happy to publish. The constraints it imposed (slower at 70mm, modest close-focus distance, visible vignetting wide open) turned out to be prompts: get closer, work the light, choose your focal length deliberately instead of defaulting to 50mm out of habit.
That’s more than most lenses have taught me.