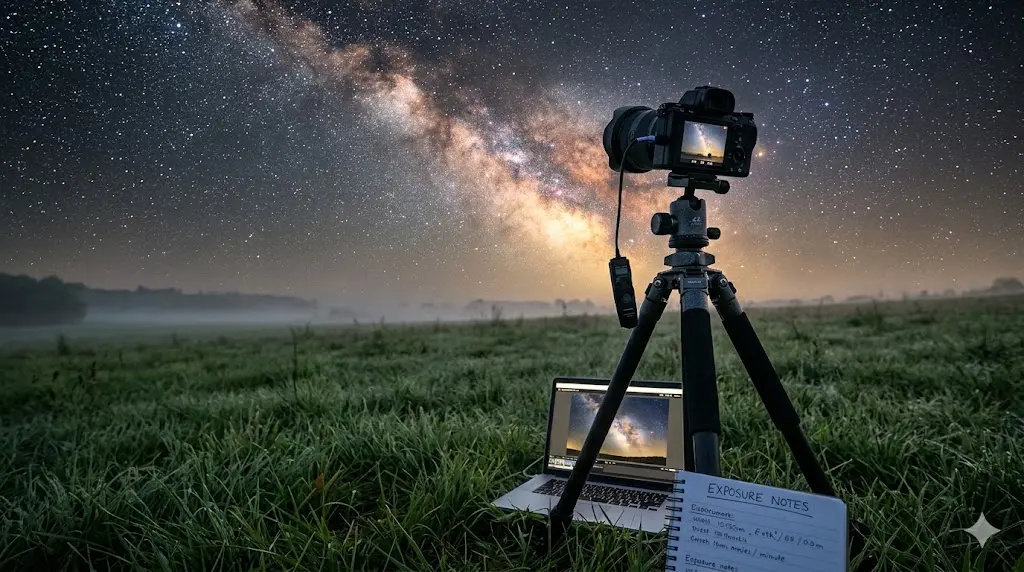
Sony mirrorless cameras have become a favorite for astrophotography, and for good reason: the BSI sensor technology in the A7 series delivers exceptional performance above ISO 6400, and the full-frame options gather enough light to capture the Milky Way without a tracker in a single exposure. This guide covers everything from initial setup to post-processing workflow for getting sharp, detailed night sky images.
Which Sony Camera Is Best for Astrophotography?
| Camera | Sensor | Best ISO Range | Why It’s Good |
|---|---|---|---|
| Sony A7S III | 12MP FF BSI | 3,200–25,600 | Lowest noise at high ISO; star tracker not required |
| Sony A7 IV / A7 V | 33MP FF BSI | 1,600–12,800 | High res + good high-ISO; great for tracked shots |
| Sony A7R V | 61MP FF BSI | 800–6,400 | Maximum detail with a star tracker; pixel-shift available |
| Sony A6700 | 26MP APS-C | 1,600–6,400 | Crop factor helps with focal length reach on targets |
The A7S III is the dedicated astro tool if budget allows. For most photographers, the A7 IV or A7 V hits the sweet spot between resolution and high-ISO capability.
The 500 Rule (and NPF Rule) for Sharp Stars
The simplest starting point for shutter speed is the 500 Rule: divide 500 by your focal length (adjusted for crop factor) to get maximum seconds before stars trail.
- Full-frame at 14mm: 500 ÷ 14 = ~35 seconds
- Full-frame at 20mm: 500 ÷ 20 = 25 seconds
- Full-frame at 24mm: 500 ÷ 24 = ~20 seconds
- APS-C at 14mm: 500 ÷ (14 × 1.5) = ~23 seconds
For higher-resolution sensors (33MP+), use the NPF Rule for more precise calculations. Apps like PhotoPills include NPF calculators for every Sony body. The 500 Rule is conservative enough that it works fine for most displays up to 24 inches; for large prints, NPF is more rigorous.
Sony Camera Settings for Milky Way Photography
Exposure Settings
- Mode: Manual (M)
- ISO: Start at 3,200 on the A7 IV/A7 V; 6,400 on the A7S III
- Shutter: Follow the 500 Rule for your lens
- Aperture: Wide open (f/1.4–f/2.8). Lenses with coma—light sources showing comet tails—may need one stop down.
File Format
Always shoot RAW (ARW). JPEG processing destroys the fine detail and shadow information that makes astro editing possible. With RAW, you have 14+ stops of dynamic range to work with when pulling up foreground exposure while keeping the sky controlled.
White Balance
Set a custom white balance between 3,400K and 4,200K. Cooler (3,400K) emphasizes the blue of the Milky Way; warmer (4,200K) shows more of the orange hydrogen-alpha nebulosity in the galactic core. Don’t use Auto—the camera will shift WB between frames during a timelapse, causing color flicker.
Long Exposure Noise Reduction
Turn this OFF. Long exposure NR takes a dark frame after each shot (doubling your wait time) and its in-camera algorithm is inferior to manual stacking in post. You’ll capture dark frames manually as part of a stacking workflow if needed.
High ISO Noise Reduction
Also turn OFF. This applies before the RAW data is written and permanently affects the file. All NR should happen in Lightroom or Astro Pixel Processor where you have control.
Focusing for Astrophotography
Autofocus doesn’t work at night. Here’s the reliable manual focus workflow for Sony cameras:
- Set the lens to infinity (∞)—but don’t trust the ∞ mark exactly; many lenses focus slightly past true infinity.
- Enable MF Assist (Menu → Camera 2 → MF Assist): the camera magnifies the view 5.9× or 11.7× when you turn the focus ring.
- Enable Peaking at High level, Color: White or Yellow. Bright stars will show peaking highlights when in focus.
- Point at a bright star (Sirius, Jupiter, Vega) and rotate the focus ring until the star becomes the smallest, sharpest point with peaking highlights.
- Take a test exposure and zoom in on a corner star to check for coma and focus accuracy before committing to a session.
Once focused, use tape across the lens barrel to lock the focus ring. Cold temperatures cause lens barrels to contract, which can shift focus slightly over a 3-hour session.
Sony Menu Settings to Configure Before a Shoot
- Silent Mode: On (reduces vibration from mechanical shutter at long exposures)
- Anti-Flicker Shoot: Off (irrelevant at night)
- Steady Shot (IBIS): Off when mounted on a tripod (IBIS can introduce micro-movement during long exposures)
- Auto Review: 2 seconds (lets you confirm exposure quickly without extending the time between shots)
- Drive Mode: Single Shoot or use the interval timer for stacking
- Display Quality: High (for accurate live-view preview of stars)
Interval Shooting for Star Trails and Stacking
Sony’s Interval Shooting feature (Menu → Camera 1 → Interval Shoot Func.) automates multi-frame captures without an external intervalometer. For Milky Way stacking:
- Set interval to shutter speed + 1 second (for camera processing time)
- Number of shots: 20–30 for basic stacking; 60+ for significant noise reduction gains
- Stack in Sequator (free, Windows) or Astro Pixel Processor for maximum quality
For star trail circles: set 200–400 frames at 20–30 seconds each, then stack in StarStaX with “lighten” blend mode.
Best Sony Lenses for Astrophotography
| Lens | Best For | Coma Wide Open | Price |
|---|---|---|---|
| Sony FE 14mm f/1.8 G Master | Wide Milky Way panoramas | Minimal | ~$1,599 |
| Sony FE 20mm f/1.8 G | Balanced wide-angle + foreground | Low | ~$899 |
| Sigma 14mm f/1.8 DG HSM Art | Wide deep-sky | Moderate | ~$1,299 |
| Rokinon/Samyang 14mm f/2.8 | Budget astro | High (stop to f/4) | ~$349 |
| Sony FE 24mm f/1.4 G Master | Milky Way + landscape | Very low | ~$1,299 |
The Sony FE 14mm f/1.8 G Master is the benchmark wide-angle astro lens for Sony. It’s sharp across the frame at f/1.8 with virtually no coma—stars in corners look like points, not comets.
Post-Processing Workflow
A basic two-step workflow for Sony astro RAW files:
- Lightroom Classic: White balance correction, slight exposure lift on foreground, highlight recovery on bright galactic core, lens correction (important for wide-angle distortion), AI Denoise at 80% (Lightroom’s AI NR is excellent on Sony ARW files).
- Photoshop or Luminar Neo: Sky/foreground masking, Milky Way enhancement, star reduction for cleaner sky.
Adobe’s AI Denoise released in 2023 changed the astrophotography landscape. A single Sony A7 IV frame at ISO 3,200 after AI Denoise at 80% competes with a stack of 5–10 frames processed in older workflows.
Frequently Asked Questions
What ISO should I use for Milky Way photography on a Sony camera?
Start at ISO 3,200 for A7 IV/A7 V and ISO 6,400 for the A7S III. In dark skies (Bortle 1–3), you may go higher. In suburban skies (Bortle 5–6), lower ISO with longer exposures and stacking produces better results than maximum ISO single frames.
Should I use IBIS for astrophotography?
Turn IBIS off when using a tripod. IBIS can attempt to compensate for Earth’s rotation at long exposures, introducing micro-blur. If shooting handheld at night (rare, but possible for aurora at 1/8s), IBIS helps.
Does the Sony A7 IV have a star eater problem?
The “star eater” issue (aggressive NR removing faint stars) was present on older Sony bodies. LENR off and HINR off eliminates this on current bodies. The A7 IV and A7 V are not affected when both NR options are disabled in RAW shooting.
What’s the best Sony lens for the Milky Way under $500?
The Sigma 20mm f/2 DN Contemporary (around $799 new, often found used under $600) or the older Rokinon 14mm f/2.8 (~$299 used). For Sony’s own lineup under $500, the FE 28mm f/2 works but requires shorter exposures at f/2.8 for good stars.
With the right settings and a dark sky, Sony’s mirrorless cameras deliver Milky Way images that were previously achievable only with expensive dedicated astronomy cameras. The combination of BSI sensor technology and Sony’s RAW file quality makes this ecosystem one of the best choices for astrophotography.