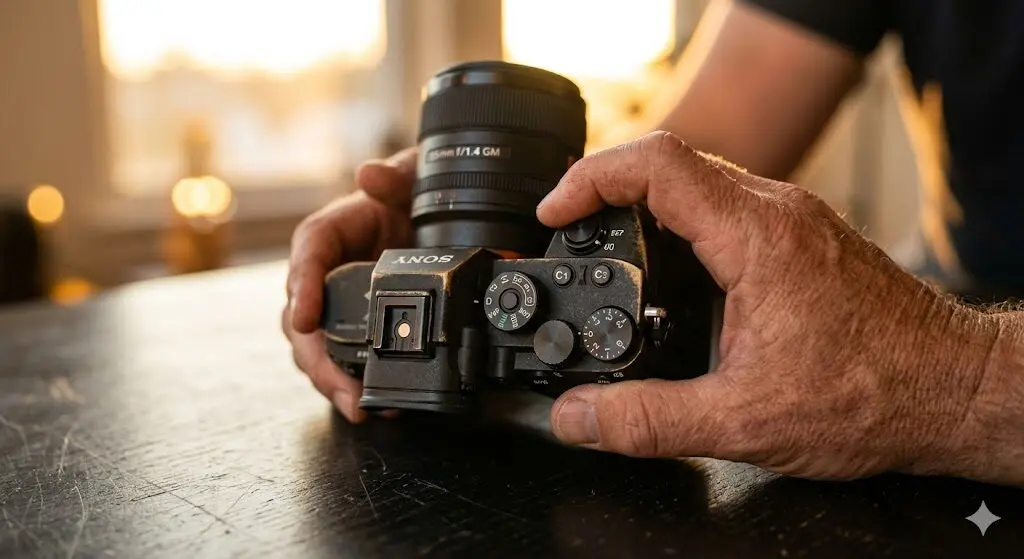
Exposure compensation is one of the most useful controls on any Sony camera, yet many photographers either don’t use it or don’t use it effectively. The exposure compensation dial—the small +/- wheel or dial on Sony bodies—is how you override the camera’s metering decision when you know the camera’s assessment is wrong for the creative result you want. Here’s how it works, when to use it, and how to make it part of your shooting instinct.
What Exposure Compensation Does
In any auto or semi-auto mode (Aperture Priority, Shutter Priority, Program Auto), Sony’s metering system evaluates the scene and sets exposure based on its algorithm. The goal of the metering system is to produce a “technically correct” exposure—which it defines as an image where the overall brightness averages to 18% gray (middle gray).
Exposure compensation tells the camera: “I know what you calculated, but make the image brighter (+EV) or darker (-EV) by this amount.”
It does not work in full Manual mode, where you control all three exposure variables directly. In Manual + Auto ISO, exposure compensation shifts the ISO value that Auto ISO selects.
Sony Exposure Compensation Scale
| EV Setting | Effect | Typical Application |
|---|---|---|
| +3 EV | 8× brighter than metered | Rare — extreme high-key |
| +2 EV | 4× brighter | White subjects on white backgrounds |
| +1 EV | 2× brighter | Backlit subjects, snow scenes |
| +1/3 or +2/3 EV | Slight brightening | Fine-tuning in tricky light |
| 0 EV | As metered | Well-balanced scenes |
| -1/3 or -2/3 EV | Slight darkening | Slight overexposure correction |
| -1 EV | Half as bright | Dark subjects, moody atmosphere |
| -2 EV | 1/4 as bright | Silhouettes, dramatic low-key |
| -3 EV | 1/8 as bright | Very intentional under-exposure for effect |
When to Use Positive Exposure Compensation (+EV)
Backlit Subjects
The most common use case: a subject lit from behind by a bright window, sky, or bright background. Sony’s metering sees the bright background and correctly meters it as a key element in the scene—which leaves your subject underexposed. Dial in +1 to +2 EV to properly expose the subject. The background will likely become somewhat overexposed, which is usually acceptable. Alternatively, switch to Spot Metering and meter directly on the subject’s face, which gives proper exposure without needing compensation.
White or Bright Subjects
The 18% gray bias of any metering system causes white subjects to be rendered as middle gray rather than white. Snow scenes, white walls, white garments, and wedding dresses are all made darker by the camera’s default metering. The fix: +1 to +2 EV brings white subjects back to white in the final image. Look at the histogram—highlights should be near the right edge, not in the middle.
Portraits in Overcast Light
Soft overcast light can lead to slightly underexposed skin tones if a dark background occupies significant frame area. +1/3 to +2/3 EV lifts the exposure to render skin at its natural brightness without blowing highlights.
When to Use Negative Exposure Compensation (-EV)
Dark Subjects or Dark Backgrounds
A black cat on a dark background, a black car, dark clothing in low light—the camera’s metering lifts these to middle gray, washing out the rich tones. -1 to -2 EV maintains the depth and richness of dark subjects.
Silhouettes
To create a deliberately dark, backlit silhouette: meter on the bright background (sky, sunset), then dial -1 to -2 EV to ensure the background is properly exposed and the subject falls to black. Spot metering on the sky + -1 EV is the controlled approach.
High-Key Sunsets
Sunsets and sunrise scenes often fool cameras into overexposing the sky because the dark foreground convinces the metering the scene needs more light. -1/2 to -1 EV preserves the saturated colors in the sky and prevents the orange/red tones from washing out.
Preventing Blown Highlights in RAW Shooting
Exposing to the right (ETTR)—shooting slightly brighter to maximize signal-to-noise in shadows—requires positive compensation. But if highlights are clipping, -1/3 EV protects them. Monitor the highlight warning (blinkies: Menu → Display/Auto Review → Highlight Warning) to see which areas are clipping.
How to Access Exposure Compensation on Sony Cameras
Dedicated Dial
Most Sony bodies have a dedicated exposure compensation dial on the top right (A7 V, A7 IV, A7C II, A6700). Marked +3 to -3 EV, it turns independently of the mode dial. Change exposure compensation by rotating this dial—it’s the fastest and most direct control method.
Rear Dial Assignment
On bodies without a dedicated dial, or when using the rear control dial: Menu → Custom Key → assign “Exposure Comp.” to rear dial or a custom button for direct access.
In Manual + Auto ISO Mode
In Manual mode with Auto ISO active, the exposure compensation dial shifts the ISO selection by the specified EV amount. This lets you set your artistic exposure (aperture + shutter) while using exposure compensation to fine-tune brightness—useful for maintaining a consistent shutter speed for motion capture while still adjusting overall exposure.
Metering Modes and When They Change Compensation Needs
| Metering Mode | How It Works | When to Use |
|---|---|---|
| Multi (Evaluative) | Analyzes entire scene, weights important areas | Default for most shooting |
| Center-weighted | Biases exposure to center of frame | Portrait with neutral background |
| Spot | Meters a small central or linked AF area | Precise exposure of one element (face, sky) |
| Highlight Weighted | Protects highlights from clipping | Stage lighting, concerts, candles in dark |
Spot metering linked to the AF point (available on current Sony bodies) is the precision tool: when you focus on a face, the camera meters exactly that area. This often eliminates the need for positive exposure compensation in backlit scenarios—the spot metering on the face ensures proper exposure regardless of background brightness.
Reading the Histogram to Guide Exposure Compensation
The histogram is the most reliable exposure feedback tool. Sony’s live histogram (enabled in display settings) shows real-time exposure in viewfinder and LCD:
- All data bunched in the middle: neutral exposure, fine for average-toned scenes
- Data pushed against left wall: underexposed (apply positive compensation)
- Data pushed against right wall with no headroom: overexposed / highlights clipping (apply negative compensation)
- Data spread broadly: good dynamic range utilization
For RAW shooting: use ETTR (expose to the right) where you keep the brightest areas just below clipping. This maximizes signal-to-noise in shadow areas while preserving highlight recovery latitude in the RAW file.
Frequently Asked Questions
Why doesn’t exposure compensation work in Manual mode on Sony?
In full Manual mode with fixed ISO, you directly control all three variables—there’s nothing for exposure compensation to change. Exposure compensation works by shifting one of the auto-controlled variables (ISO in Auto ISO mode, shutter in A mode, aperture in S mode). In fully manual mode with all three fixed, no auto variable exists to shift.
How much exposure compensation should I use for portraits?
Start with 0 EV and adjust based on your live histogram. For subjects lit from behind a bright window, +1 to +1.5 EV is a common starting point. For subjects in even lighting against a neutral background, 0 EV or +1/3 EV typically produces correct skin tones. Always verify with the histogram rather than the LCD which varies in brightness with ambient light.
Does exposure compensation affect video on Sony cameras?
Yes—exposure compensation works in video mode on Sony cameras in aperture priority or program mode. For manual video exposure (recommended for professional video work), exposure compensation doesn’t apply (same as full Manual mode for stills).
What’s the difference between exposure compensation and EV limit?
Exposure compensation is the real-time override of the metering calculation during shooting. EV limit sets the maximum range available on the compensation dial. Most Sony bodies allow -5 to +5 EV via the menu; the standard dial provides -3 to +3 EV. For specialized work requiring extreme compensation, expand the EV range in the camera menu.
Exposure compensation is a shooting-speed tool that should become instinctive. The photographers who consistently nail exposure in challenging conditions aren’t necessarily shooting in Manual mode—they’re reading their scene, predicting how the metering will respond, and dialing in the appropriate correction before raising the camera. Practice with the histogram until exposure judgment becomes second nature.